Effective: 01/09/2025
Account number may be identified on the invoice as the following: Customer #, customer ID, client #, client ID, Master Station, Merchant Number, ship to, Case #, Employer Code Number, Advertiser Number, Shipper Number, Payer Number, and Parcel ID [land/acreage].
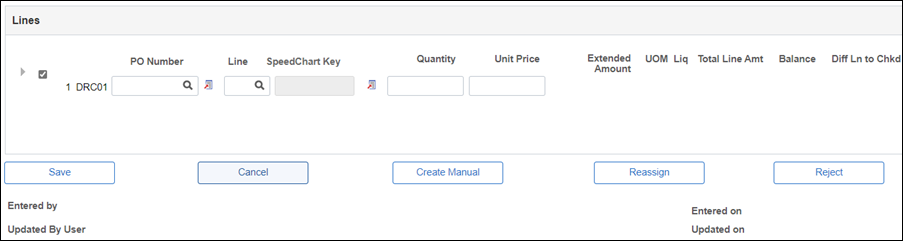
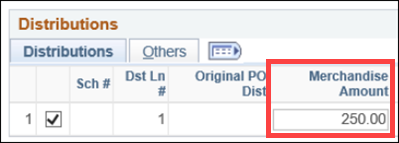
A red boxred box will display next to the Invoice Amount field throughout processing until the Invoice Amount is equal to the Merchandise Amount.

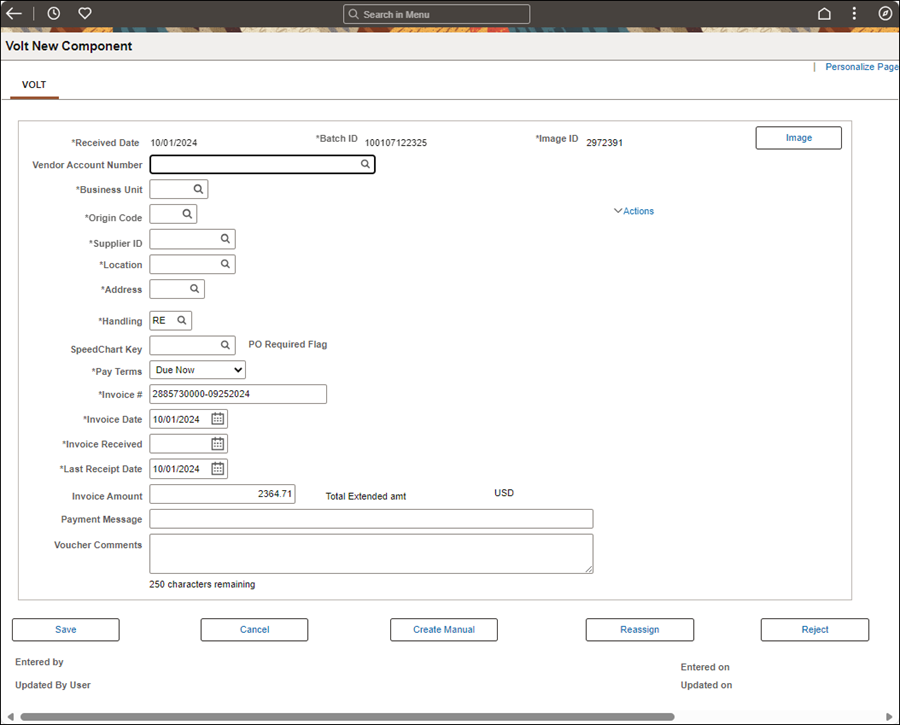
Validate the Origin Code.
A red boxred box will display next to the Invoice Amount field throughout processing until the Invoice Amount is equal to the Merchandise Amount.
![]()
A red boxred box will display next to the Invoice Amount field throughout processing until the Invoice Amount is equal to the Merchandise Amount.
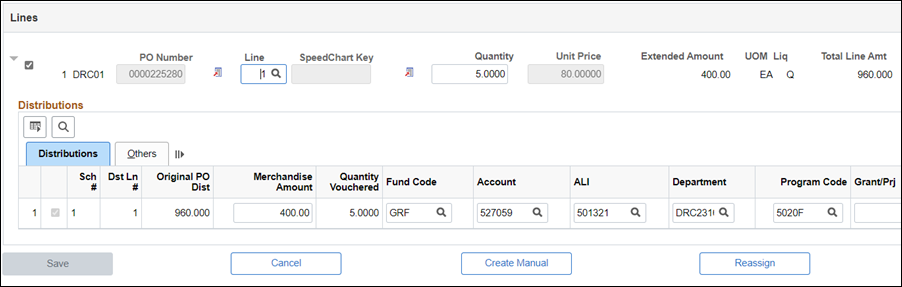
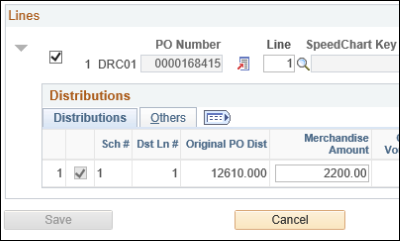
Enter the PO Number and press Tab on the keyboard.
A purchase order is required to be used for:
Invoice amounts over $5,000 that are not Grants, Subsidies, or Utilities.
If the Supplier ID populates with "ENC," refer to the Creating a Voucher with an ENC Purchase Order.
The Supplier Location and the Address Sequence Number must always match if payment is to be made by EFT, SWCD, or WIA (e.g., select "EFT-2" if Address Sequence Number "2" is selected). If EFT does not have a corresponding address, use CHK.
EFT is the default payment type when available. The agency or supplier may redirect the payment type.
Select "CHK" only if "EFT" is not available with a corresponding address.
The address selected must be an exact match to the supplier address from which the invoice was sent (not necessarily the address where the warrant will be mailed).
Zip code information (only the first 5 digits) must match between the invoice and the supplier record in OAKS FIN to continue the voucher process.
If there is a discrepancy in the zip code between the invoice and OAKS information, follow the steps below:
Verify the zip code in USPS. If information in OAKS matches with information in USPS, the invoice can be processed.

This form is designed to allow agencies to submit any agency-desired processing information in addition to the invoice. However, the invoice should be used as the primary document to follow.
Verify or edit Pay Terms.
Correct usage of supplier Pay Terms allows OAKS FIN to calculate late interest charges, early payment discounts, etc., (based on the Invoice Date).
If the Invoice Number field populates with "Critical," click herehere.
![]()
A purchase order is required to be used for:

